
Hello
Friends,
Want
to add some simple updates to your bathroom without breaking your wallet? Try
this Do It Yourself Tutorial on how to frame your bathroom mirror! We also
recommend replacing
Supplies:
·
1×4’s
(Number depending on the size of your mirror)
·
Miter Saw or Miter Saw Box & Hand Saw
·
Staple Gun & Staples
·
Wood Glue
Take Measurements. Cut the Wood
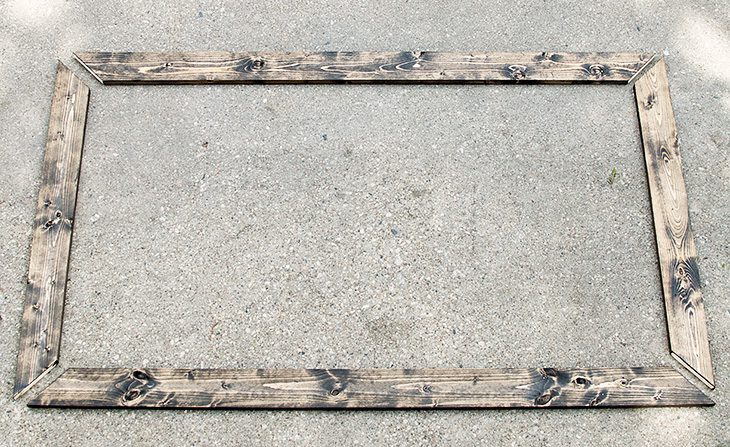
First you have to determine how big to build your frame. This frame is built with mitered corners, meaning cut at a 45 degree angle to create a 90 degree angle when paired with another board. I wanted mine to fit exactly over our current mirror since it was already the width of the vanity. Our mirror was 60″ wide, so this was my measurement for the long side of my horizontal boards. The mirror height was 36″ so this was the long side of my vertical boards. You’ll see in the picture below. So when making your 45 degree cuts, you need to make sure your longest side is the correct measurement, not the shorter side.
First you have to determine how big to build your frame. This frame is built with mitered corners, meaning cut at a 45 degree angle to create a 90 degree angle when paired with another board. I wanted mine to fit exactly over our current mirror since it was already the width of the vanity. Our mirror was 60″ wide, so this was my measurement for the long side of my horizontal boards. The mirror height was 36″ so this was the long side of my vertical boards. You’ll see in the picture below. So when making your 45 degree cuts, you need to make sure your longest side is the correct measurement, not the shorter side.

One you have all your pieces cut, it’s time
to attach them. There are a few different ways to do this, but I wanted to
share with you the quickest and least messy way! You’re welcome!
Glue and Staple the Boards
Flip all the boards over so the back is facing up. Add wood glue to one of the mitered edges and line up your joint. While holding it in place, staple your board together directly over the seam. Let the glue dry for a bit before moving it.
Flip all the boards over so the back is facing up. Add wood glue to one of the mitered edges and line up your joint. While holding it in place, staple your board together directly over the seam. Let the glue dry for a bit before moving it.

Finish Your Wood.
I’ve actually got a tutorial for this coming very soon, but you can essentially finish it anyway imaginable.
I’ve actually got a tutorial for this coming very soon, but you can essentially finish it anyway imaginable.

Add Decorative Braces
Now it’s time to add those “L” shaped braces. First I spray painted mine with some Black Hammered Paint, but again, whatever fits your style. Then just attach the braces on the front of the frame and it’s ready to go!
Now it’s time to add those “L” shaped braces. First I spray painted mine with some Black Hammered Paint, but again, whatever fits your style. Then just attach the braces on the front of the frame and it’s ready to go!

Hang the Mirror
To hang the mirror I actually used command strips. I’m always changing my mind and this method isn’t permanent so it worked out great for us, but the sturdiest way to do this would be gluing it directly to the mirror, after you make sure your mirror is secure of course! TIP: If your mirror is like mine and had those ugly plastic clips, replace those for some washers and it allows you to get the frame pretty much flush with the mirror!
To hang the mirror I actually used command strips. I’m always changing my mind and this method isn’t permanent so it worked out great for us, but the sturdiest way to do this would be gluing it directly to the mirror, after you make sure your mirror is secure of course! TIP: If your mirror is like mine and had those ugly plastic clips, replace those for some washers and it allows you to get the frame pretty much flush with the mirror!
What was your favorite Do IT Yourself home
project? We would love to hear from you!
Thanks so much,
ERA Skyline Real Estate
No comments:
Post a Comment